Tips and Tricks: DIY Dice Roller Potion Bottle!
Jump to:
We tried two variations of the dice roller potion bottle, both with the goals of being low cost and accessible as a kid’s craft. I went with air drying glue and leftover bottles on the first one to show that you can use normal craft supplies to do this (as long as you’re patient with drying time). The second one uses dollar store epoxy tubes because I wanted to show that you can do this without buying a giant jug of epoxy like in some of the tutorials I’ve seen. I hope these two versions feel like something that you can do with your kid(s) and that you have fun trying them out!
Variant #1: Leftover jars and air dry glue
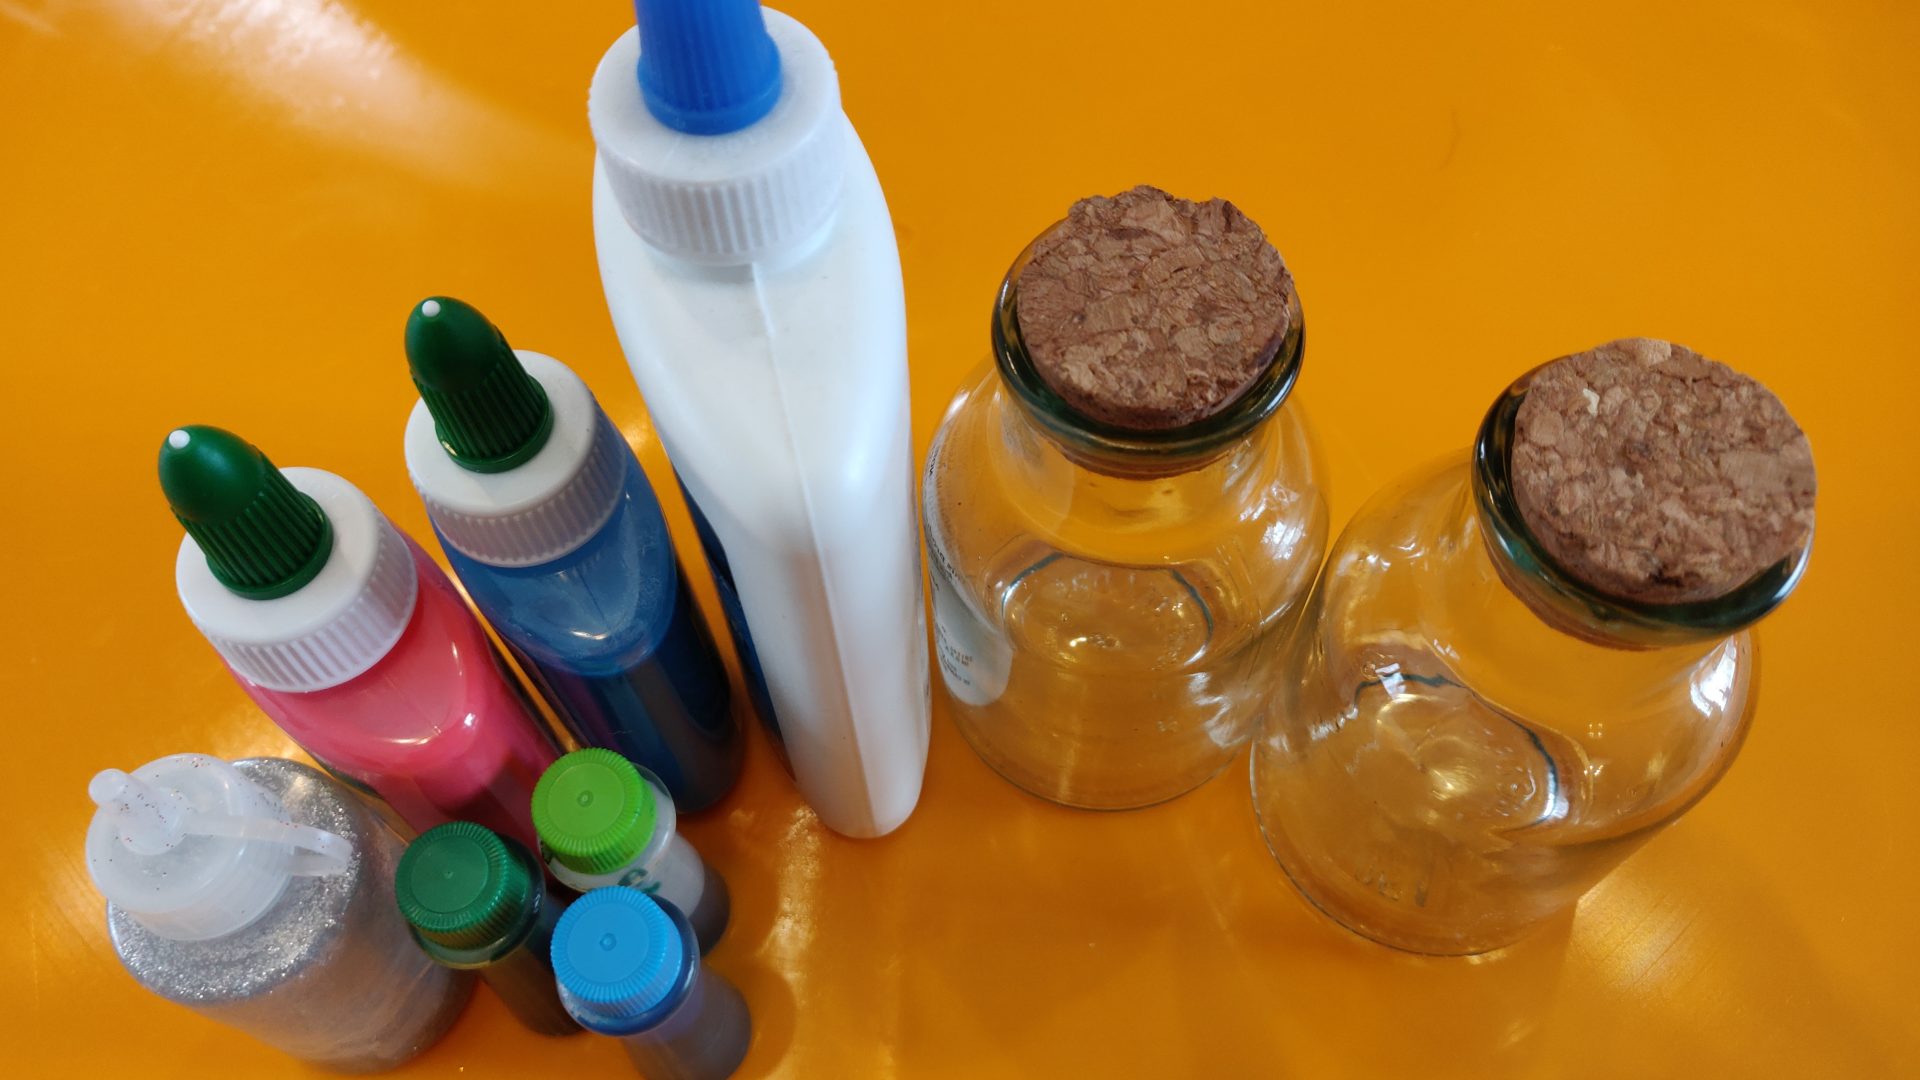
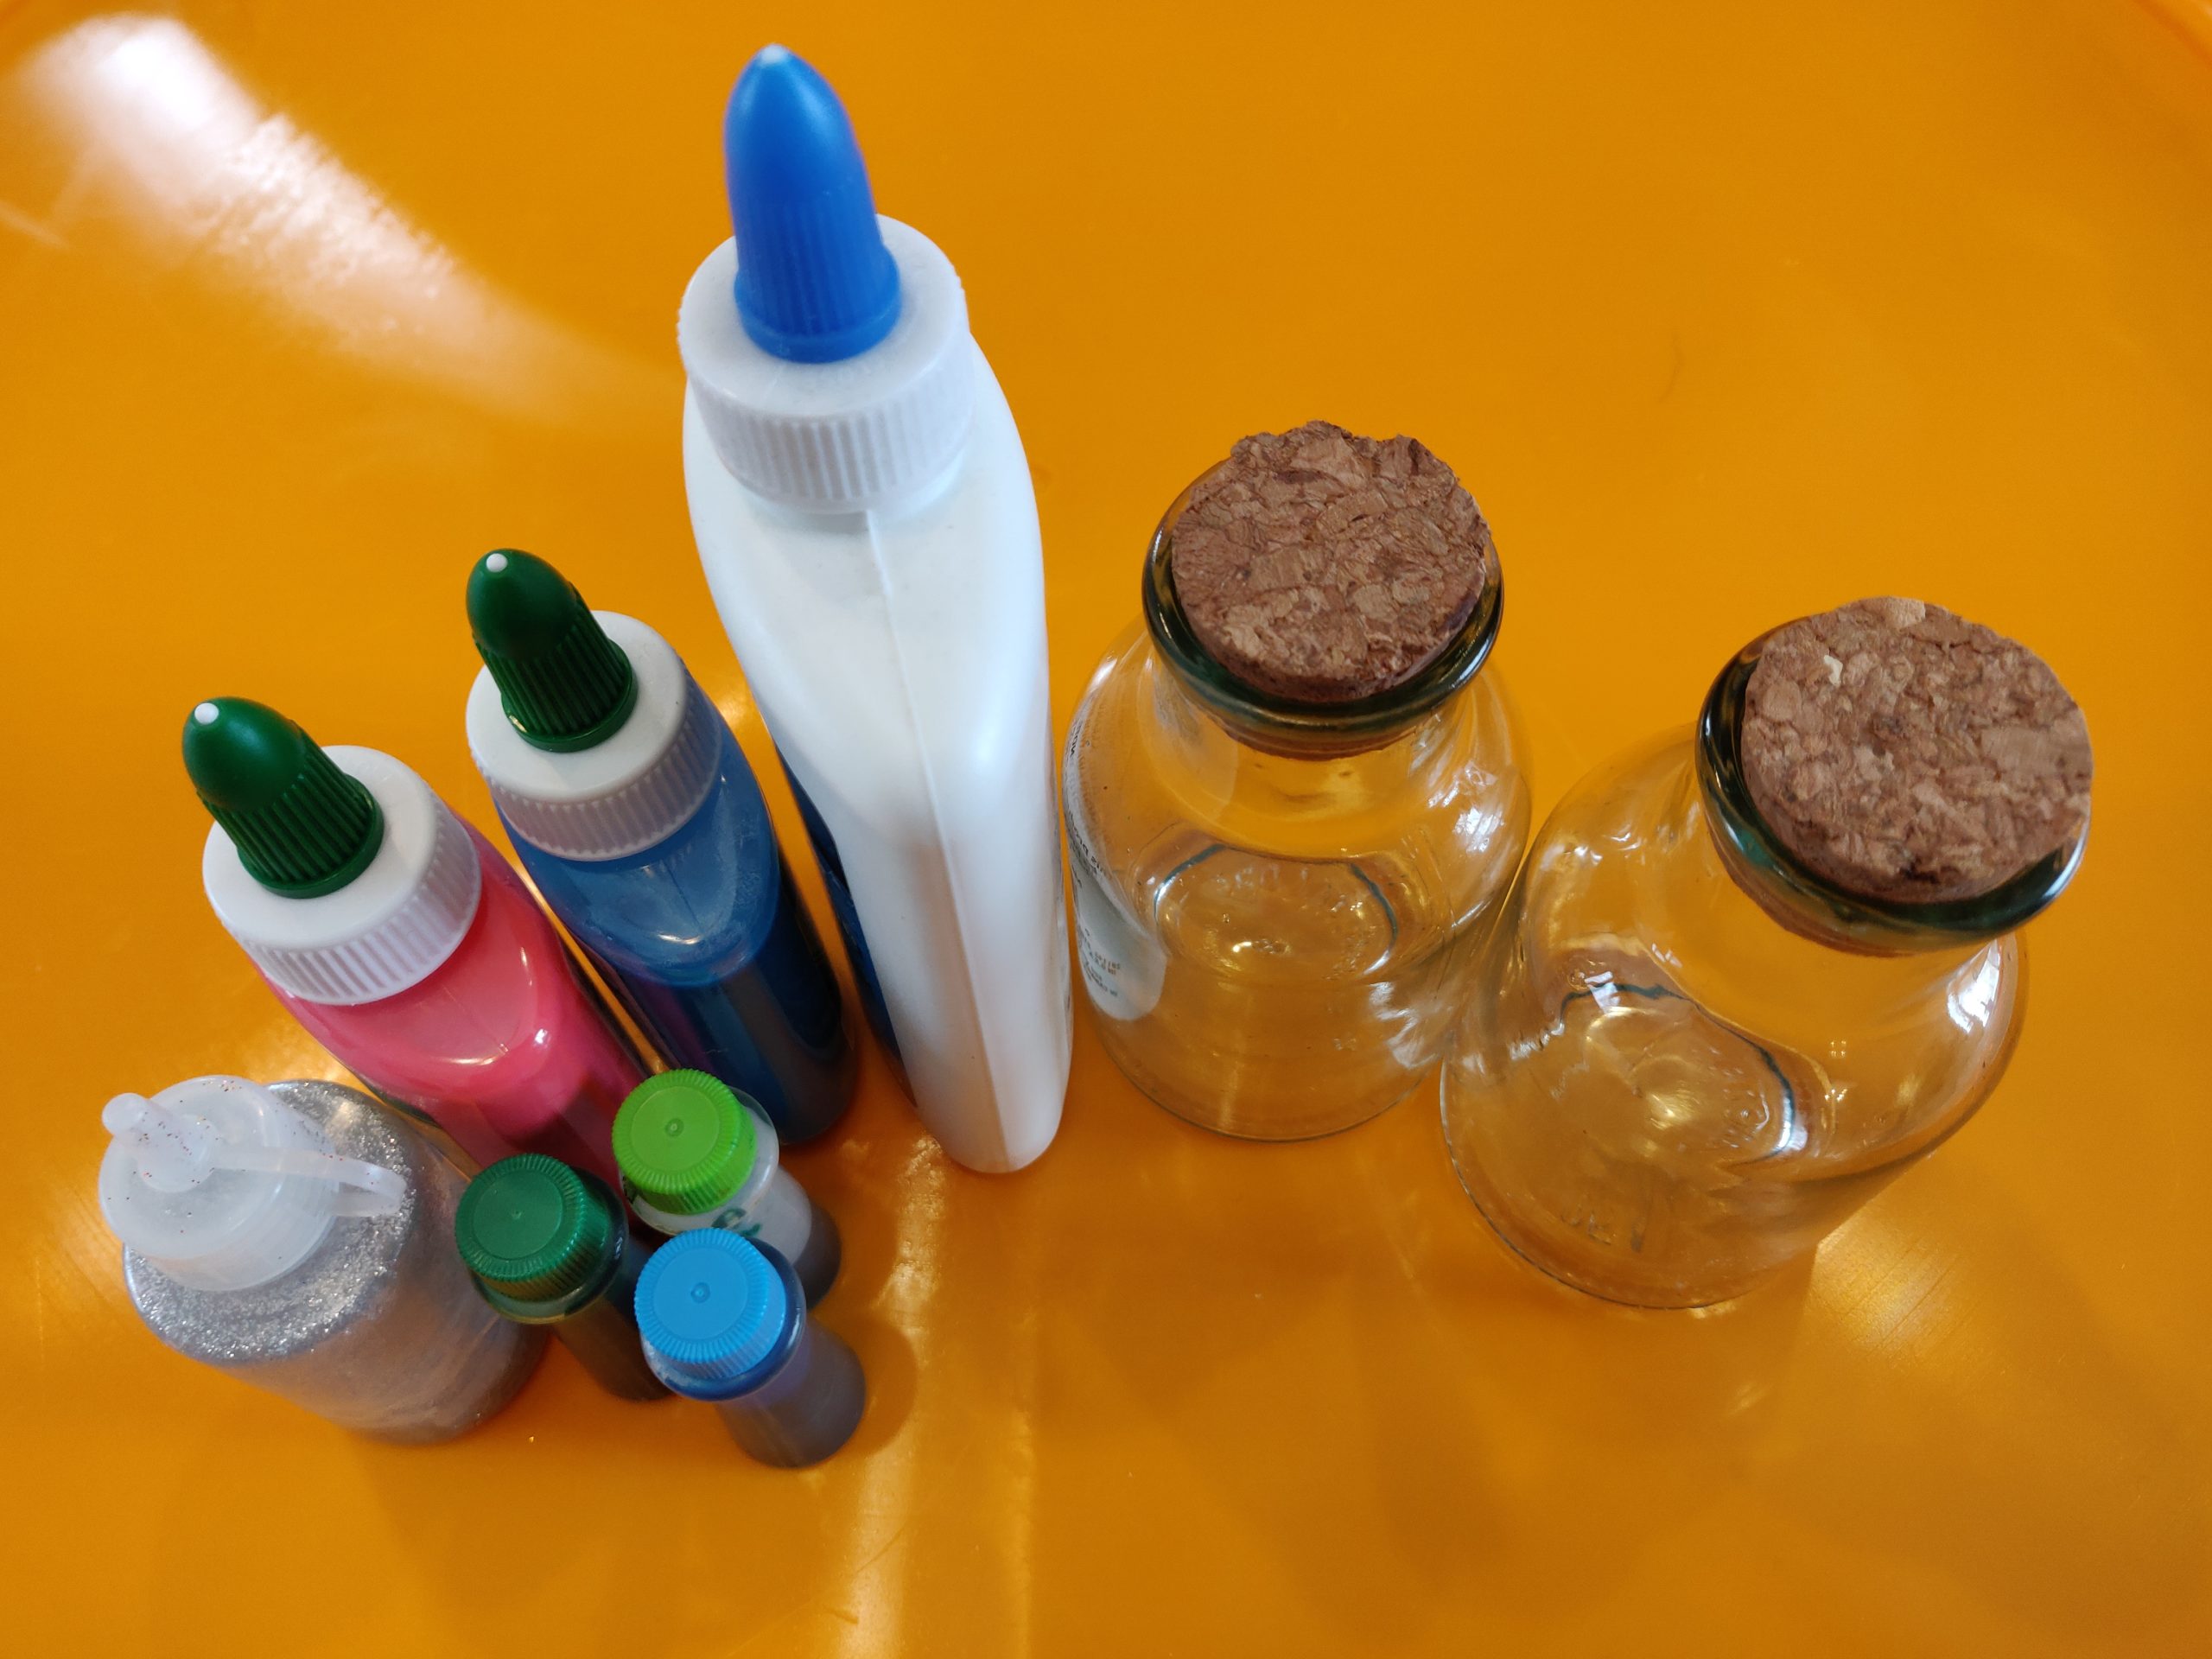
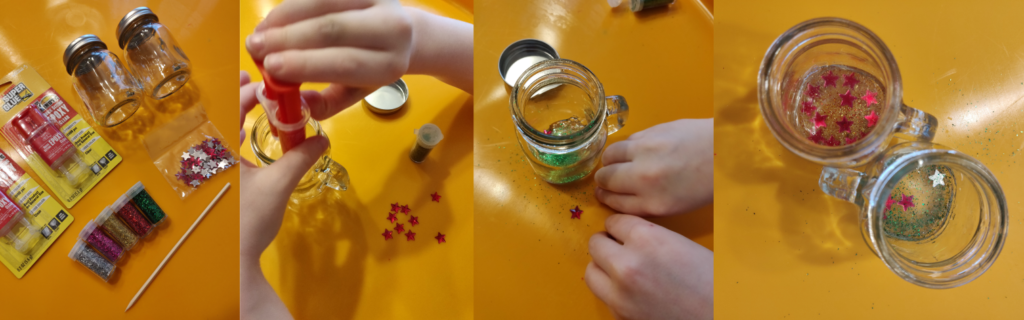
Materials needed:
- Leftover jars or bottles
- Air drying glue
- Optional: food coloring, glitter, and other add ins
- Dice
Time needed: 2+ weeks
Clean the bottles
To make this dice potion bottle, you first need to clean off any labels that are still on your bottles. I soaked the bottles in warm water then used a rough scrubbing pad to get the labels off pretty easily.
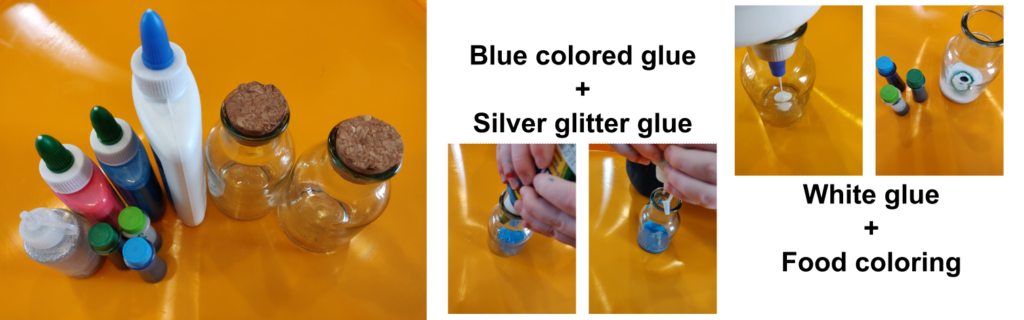
Add glue and mix-ins
After that, squeeze in your glue and add any extras (like glitter or food coloring)!
I would recommend not to fill it too much – we only did about ¾” depth, and it took a couple weeks to fully dry, so filling the bottle halfway could take a very long time.
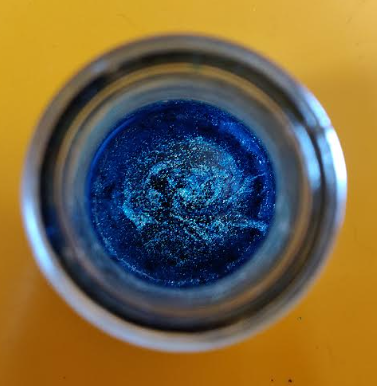
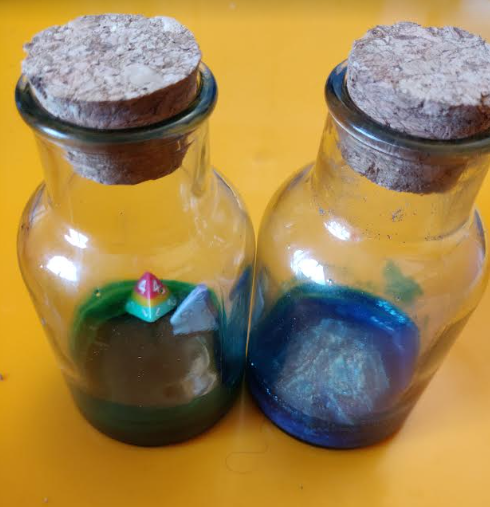
We used a pre-colored blue glue and some silver glitter glue for the blue bottle, and for the green, it was just white glue and some blue and green food coloring. I tried to get a ripple effect going on the green one, but it just ended up bleeding into the white glue (however, I still really love the deep green it made).
WAIT
The downside to this variation was definitely the wait. It took two full weeks for the glue to dry! We were OK with it because it ended up being a fun project to see it slowly go from wet glue to totally dry day after day, and it became part of our morning routine to check on the bottle, so it was fun in that sense. However, if you want to use your potion bottle right away or don’t want to wait and check on it, this might be a little rough.
Use your potion bottle!
Once the glue is fully dry (we checked by poking the inside with a chopstick), you can add some dice and get rolling!
Thoughts and recommendations
This variant is really easy and low cost (it’s just a little glue and a leftover bottle), but it does take a while before you can use it. If you wanted to speed it up, you could do less glue in the bottom, but possibly spread glue up the inside walls or drip it down from the mouth of the bottle when you put it in so that there’s more surface area exposed and you focus on getting a cool effect on the walls instead of having a hefty base.
The major upside, besides being made from stuff already at home, is that it’s reliable as long as you’re patient. You just pour the glue in and wait and it gets REALLY solid, so you don’t have to worry about even mixing like you do with epoxy.
These were our favorite bottles out of the two variations and my recommendation for trying out if you have the time to spare.
Variant #2: Dollar store epoxy and materials
Materials needed:
- Small bottle ($1)
- 2 small tubes of epoxy ($2)
- Optional: glitter or other mix ins ($1-$2)
- Stirring stick
- Dice
Time needed: 1 day
Epoxy!
Typically you would use a jug of resin and a jug of hardener, mix their contents, and then pour them into the bottle, but… I wanted to challenge myself to do this with stuff only from the dollar store and in quantities that seemed accessible for just doing a one-time craft..
You’ll need to squeeze two full tubes into the bottle to have enough to form a small base. Then, you need to mix it REALLY well with your stirring stick. If it’s not fully mixed, you could end up with little pockets of resin that will never harden, and you won’t be able to use your bottle without getting your dice messy. It should get to about a peanut butter consistency once fully mixed.
Add glue and mix-ins
After that, you can add some glitter or confetti! We had some sparkles and stars that we added in and then mixed together with our stirring stick to incorporate into the epoxy.
Wait (for the full cure time)
The epoxy that I used was 5 minute epoxy, which means that it will be somewhat solid but still kind of tacky after 5 minutes. Despite it saying 5 minute epoxy, it actually takes about 16 hours to fully cure. This is way less time than doing the air dry glue method, but, I want to give a full heads up, it does take quite a bit longer than the 5 minutes on the label.
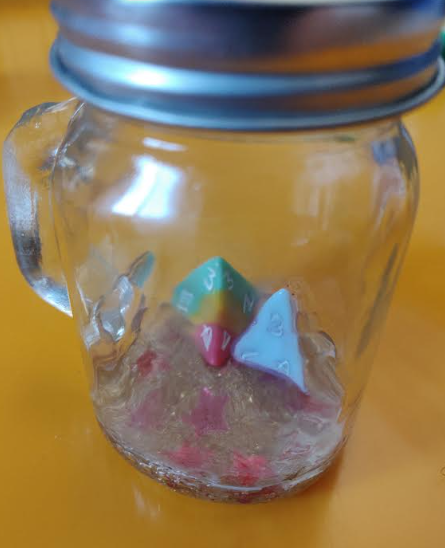
Check and use your potion bottle!
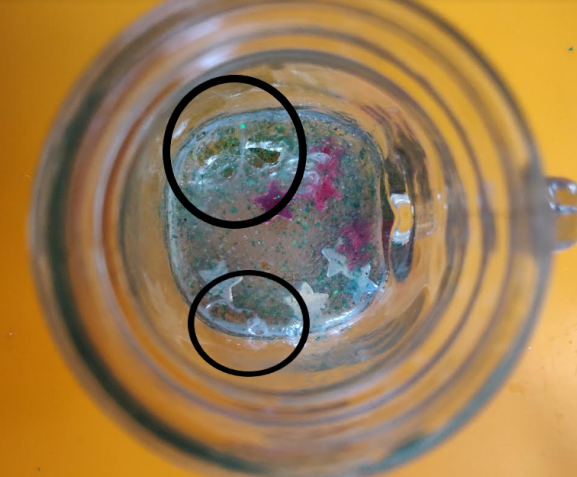
Once the epoxy is fully set, I would recommend poking it a bit with another stirring stick to make sure that it’s fully cured and there’s no pockets of uncured resin that could get your dice sticky. One of our bottles, we didn’t mix fully because it was hard to stir along the edges, so we ended up with a sticky pocket that we can’t really use, but the other one turned out OK! As long as it’s all set, add some dice and get rolling!
Thoughts and recommendations
This variant is about as easy as the first one and A LOT faster from start to end, so you can use it the day after you’ve mixed everything.
The downside is that you really need to make sure it’s mixed well, and that might be hard to do with a young kid controlling the mixing part. I would recommend, especially if you wanted to get a little more height on the potion base part, to use a bit more epoxy and to mix it outside of the bottle then scoop it in so you don’t get any resin pockets stuck on the sides where it’s hard to mix.
Conclusions
I hope these two variations of the dice potion bottle give you some ideas for doing this type of craft at home, you can use our lessons learned, and it feels accessible. It doesn’t need to be an expensive activity or very difficult, and it should be something fun that young kids can participate in and make themselves with just a little supervision! Happy crafting!
If you liked this post, make sure to subscribe to the TTRPGkids monthly newsletter to stay up to date on the latest reviews, tips and tricks, game and podcast list updates, and more! Thank you for playing tabletop RPGs with your kids and sharing this awesome hobby with the next generation!